Migrating my site to GitHub and Cloudflare

I’ve owned nielsreijers.com for a long time, but I never really did anything with it. Until recently, it only had my CV, my contact information and a photo. It’s registered with gandi.net, which also hosted it for a fee of 10 euro per month. That always felt a little steep for my use case, but not high enough to make me look into other options.
The trigger to finally do so was that I wanted to start this blog. Gandi’s hosting comes with Grav as a CMS, which has many options and plugins, including for blogging. It looks fine, I really don’t know it very well, but it seemed much more complicated that what I needed. I just wanted to host a simple blog and occassionaly upload a new post. Also, I want to have my site under my own source control instead of using Grav’s built-in editor.
Enter GitHub Pages and Jekyll
So instead of spending a day or two getting to know Grav and all it’s options, I started to look for a simpler alternative and quickly came across GitHub Pages: free, simple hosting of some static data. Exactly what I was looking for. It comes with Jekyll, a static site generator written in Ruby. You’re not tied to Jekyll, you can do basically any setup you want with GitHub actions, but for my use case Jekyll works very well.
I was amazed how easy this was to set up. Just create a repository called <user>.github.io on GitHub, tell GitHub from which branch you want to publish you site, and, like magic, an empty https://nielsreijers.github.io is born.
Jekyll then makes it extremely easy to setup the basic site I was looking for:
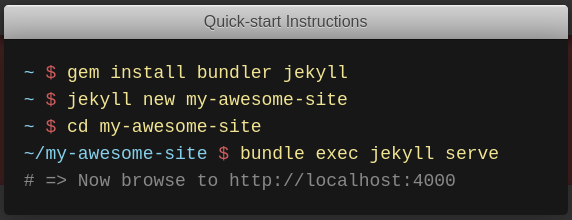
After these few lines and pushing the result to my repository, Jekyll’s default site appeared. It’s very basic, but it looks good, comes with a simple navigation bar, and has built-in support for a blog.
Looking at the source, it’s immediately clear that blog posts go in the _posts directory, with an example to get you started, and the .md files in the root become pages that are automatically added to the nav bar. This is all that appeared in my new project:
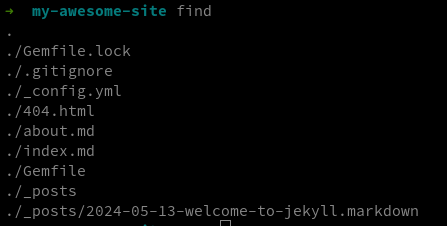
Very minimal, but functional and clear. I like it.
Testing the site locally
You can test a site locally by running bundle exec jekyll serve, and… oops…

This was really the only bump in the road, and luckily GitHub documented the issue well: newer versions of Ruby no longer include the webrick package, so you have to do a bundle add webrick first.
After that it works, and the site is available on http://localhost:4000.
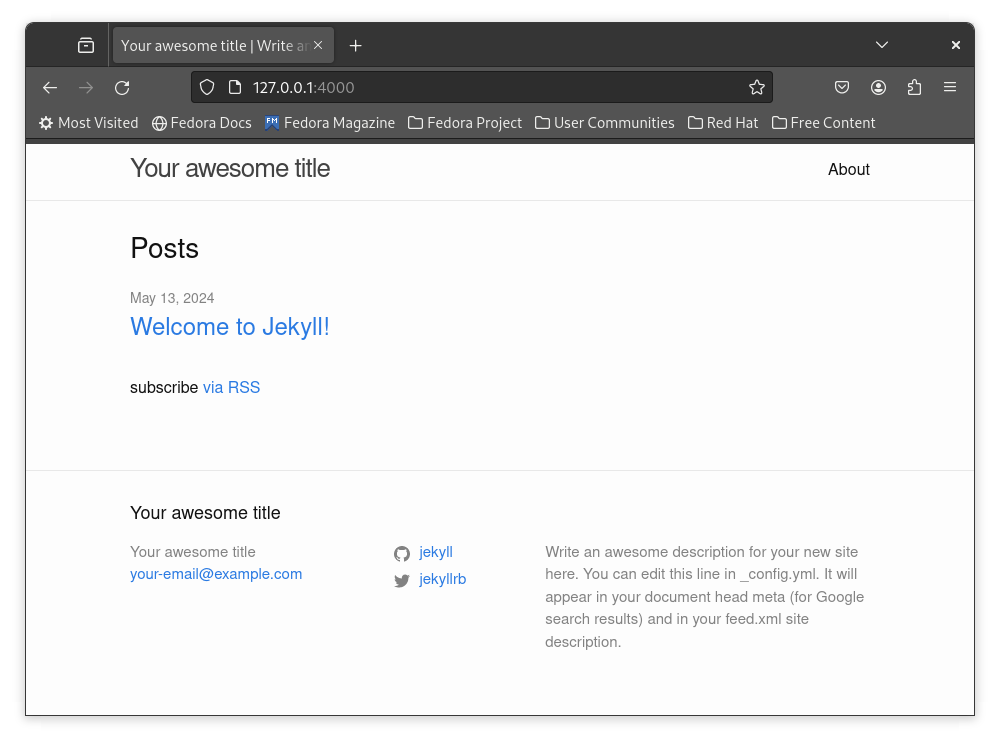
What I like about this setup is that it’s very easy to test the site and see what a post looks like. When I’m happy with it, I just commit and push my changes, and a minute later the real site will be updated.
A small word of warning: when running Jekyll locally, you do need to be aware that the version GitHub uses may not be exactly the same and that it has some restrictions. For example, at some point I wanted to write a little plugin in Ruby, but this wouldn’t work on GitHub Pages because it doesn’t allow custom code for security reasons.
Customising the layout
I wrote my first few blog posts on nielsreijers.github.io, but the longer term goal was always to merge it with nielsreijers.com, keeping the old url, but hosting the content on GitHub Pages.
While the Jekyll’s default theme was nice, I preferred the theme I was using on my old site, so I started tinkering with Jekyll.
The first question was how to change a Jekyll theme? As we saw, the repository doesn’t contain much, and all the styling is stored somewhere else in a Ruby package.
Luckily Jekyll’s documentation is excellent. In one, not too long, page, it explains how to use a packaged theme, how to override parts of the theme, how to create, package and publish your own themes, and even how to pull the complete contents of a theme into your site to remove the dependency.
In this case I had the choice of either selectively overriding parts of the theme, or copying the whole contents into my site and modifying it. I opted for the latter since I felt I would be making a lot of changes, and didn’t want my site to break if the underlying theme was ever updated.
The command bundle info --path minima shows where the theme (called ‘minima’) is stored:
/home/niels/.rbenv/versions/3.1.2/lib/ruby/gems/3.1.0/gems/minima-2.5.1
It contains just a few files:
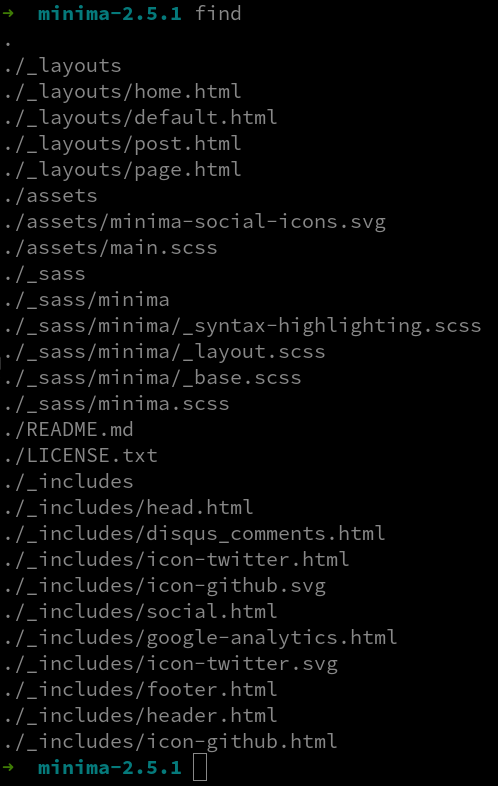
That’s it. This clean design really helped. I had never worked with Jekyll themes or Liquid templates before, but just looking at the contents of the theme quickly made it clear what each file did and how they fit together.
Getting the layout right still took some time since I’m not a front end developer. Originally I tried copying the style sheets from the old Grav site into the Jekyll template and merging the two, but this quickly got messy because the Grav code was much more complex. So I decided to stick with the simple Jekyll theme and copy whatever I felt was necessary from the Grav theme until the result was roughly the same.
I’m still not 100% satisfied with it, but for now it’s good enough to let the old site go.
Cloudflare
Just before starting this migration, I had put Cloudflare in front of nielsreijers.com. This has several advantages:
- it’s content delivery network stores my content in various locations around the world, making the site load faster,
- it improves security, protecting me from DDoS attacks and detecting bots, and
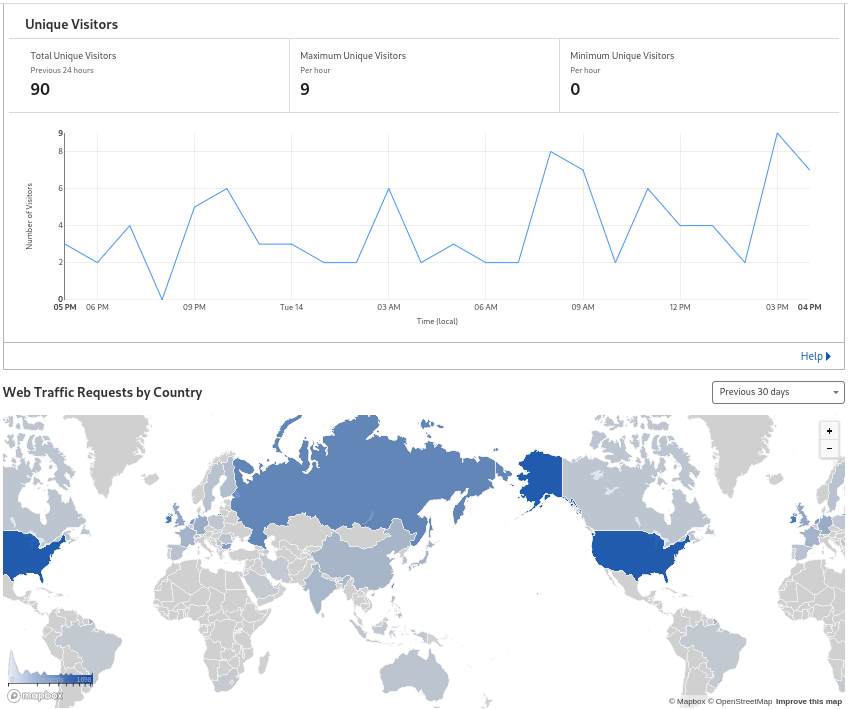
- it has better analytics than I had before, showing me how often and from where my site is accessed.
I probably don’t need these for my simple site, but it’s free and I wanted to try out their service.
I have to say I’m impressed with how smooth the process to sign up is! The first step is to tell Cloudflare the url of your site:
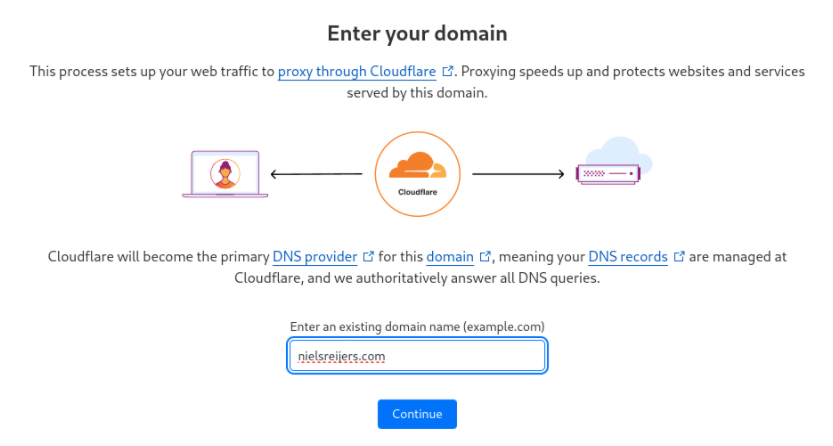
Cloudflare then queries the DNS records for your site:
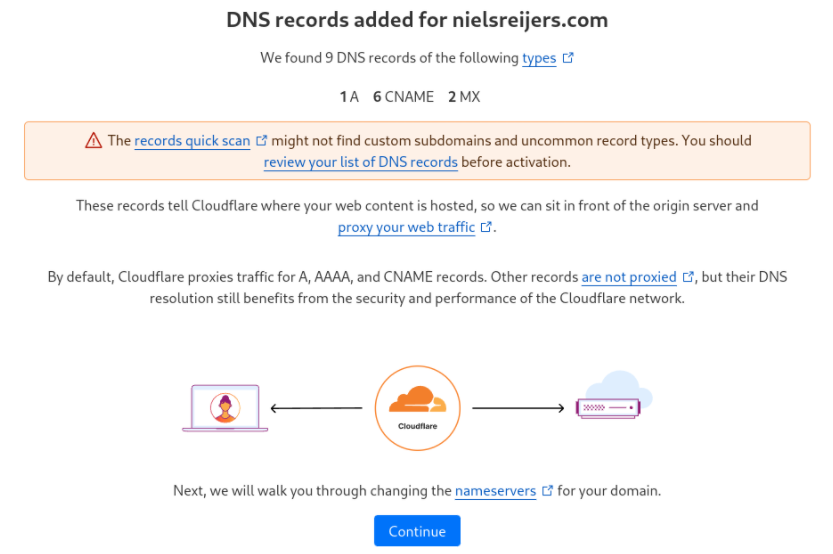
And imports them:
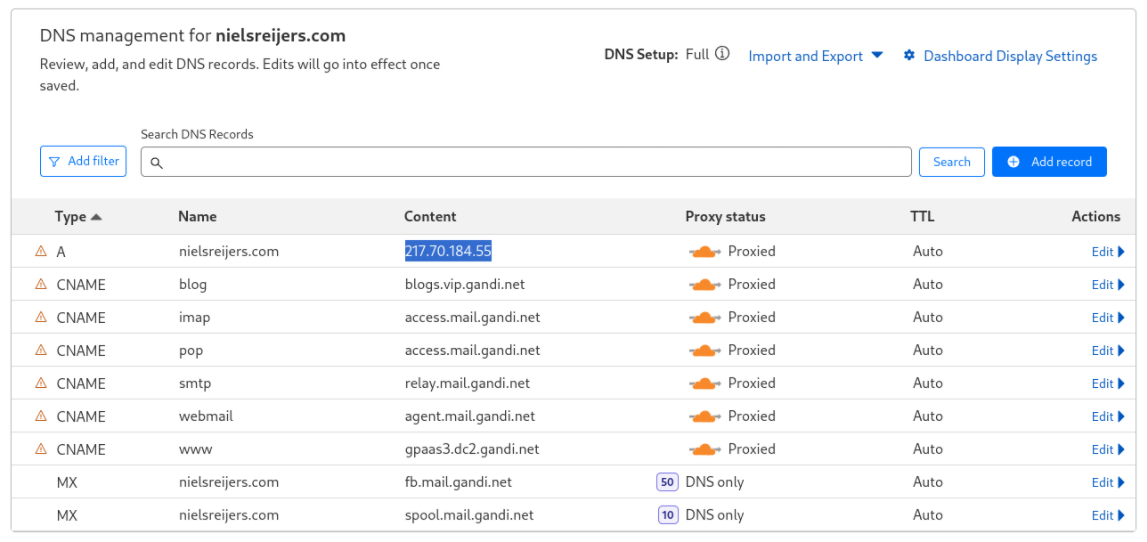
Next, the most technical step is telling your registrar to let Cloudflare manage the DNS records for your site. The wizard gives you two names, which you have to enter in your registrar’s config as nameservers to hand over control.
In my case this meant changing Gandi’s LiveDNS servers:
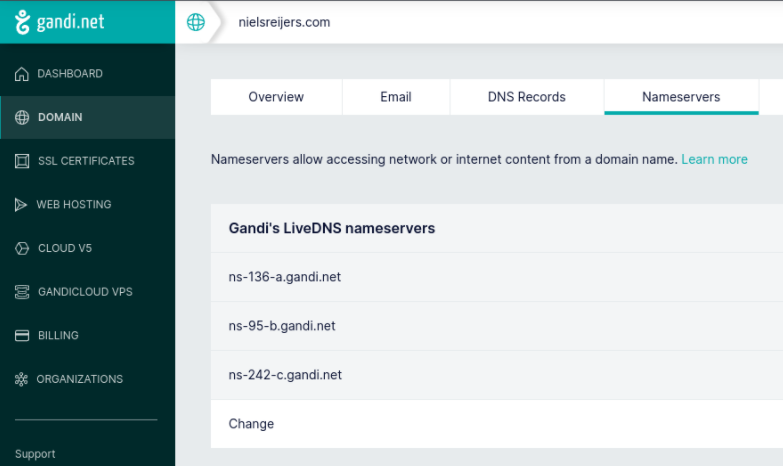
Into external nameservers:
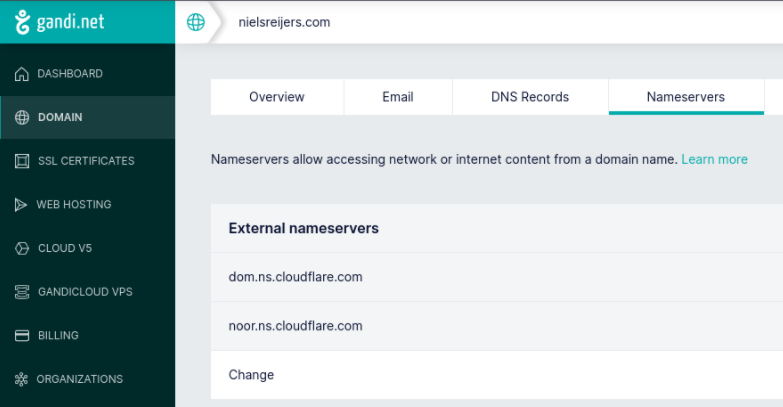
After this step, and waiting for a few minutes to let the settings propagate, Cloudflare was protecting my site!
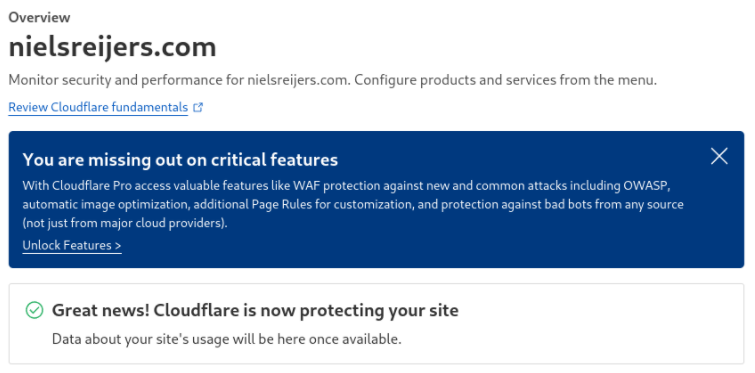
It immediately felt a little faster, but I didn’t do any measurements so that may just have been a placebo effect. Performance was already acceptable, and a simple site like mine probably isn’t at great risk of being DDoSed or hacked. But as I said, I mostly did this to try out the service, and I’m impressed with how smooth this process was and how polished yet functional the UI is.
And even for a simple site like mine, the insight into my visitors is nice to have:
Redirecting to GitHub Pages
Having moved the bit of static content I had on my old site (my CV and contact information) over to the new GitHub Pages version, the final step was to have nielsreijers.com point to the new site.
I expected this to be a complicated process, but in reality it was almost as simple as the Cloudflare configuration had been.
To use a custom domain for your GitHub Pages site, it is recommended you first verify the domain with GitHub to make sure only you can use it. If for some reason my repository is ever deleted or disabled, or anything else happens that unlinks the custom domain while the domain itself is still configured for GitHub Pages, anyone else could link a repository to my domain. This is what verified domains prevent.
The process is very simple: you need to prove you own the domain by adding a DNS TXT record, which is basically a comment that can contain anything.
In this case it should contain the code GitHub provides:
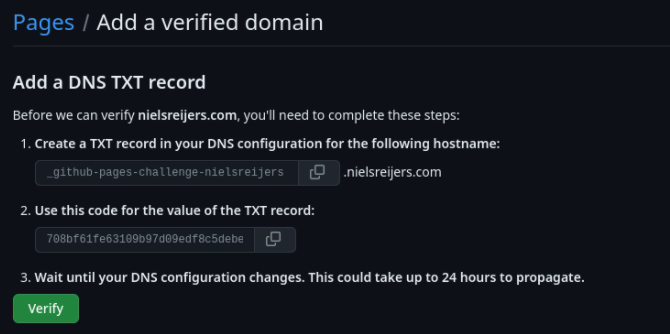
I added this to my DNS configuration in Cloudflare:
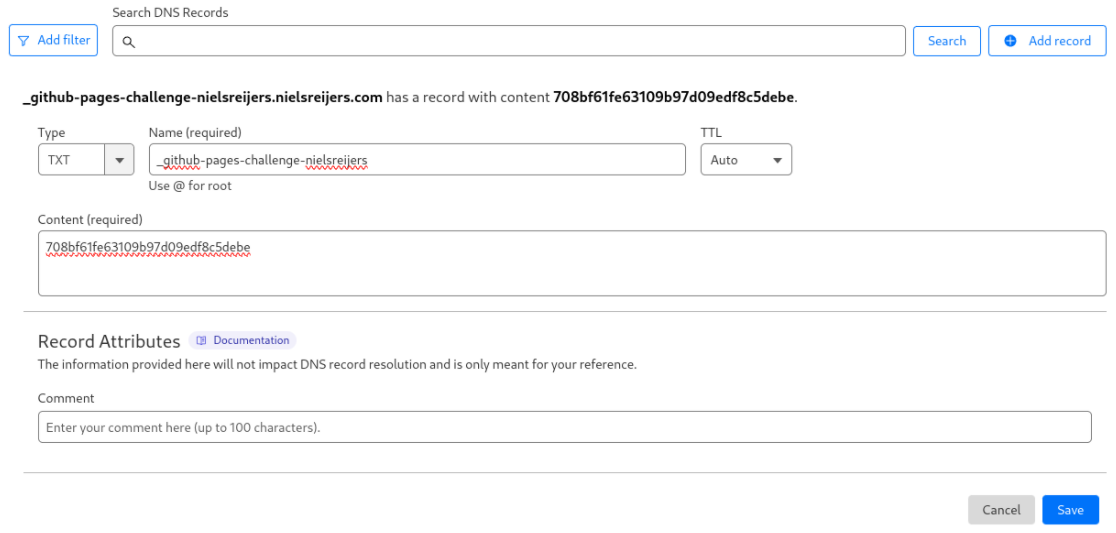
This takes a few minutes to propagate, after which the domain is verified:

Next, the process to have nielsreijers.com point to the GitHub page, is explained very clearly and takes just two easy steps.
Similar to how we needed to change the nameservers in Gandi from Gandi’s own to Cloudflare’s servers to hand over control of domain, we now need to change the IP addresses of the DNS A and AAAA (for IPv6) records from Gandi’s hosting to GitHub Pages. The GitHub instructions provide a clear list of which 4 IP addresses to add:
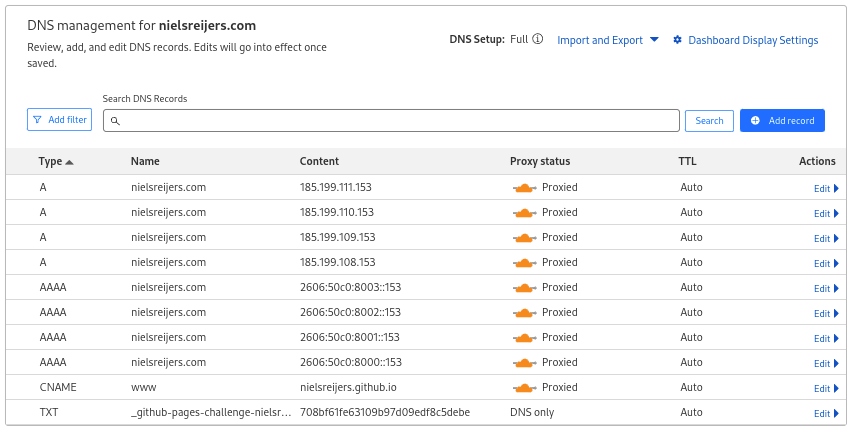
After this, the final step is to add the domain name to the GitHub Pages setting:
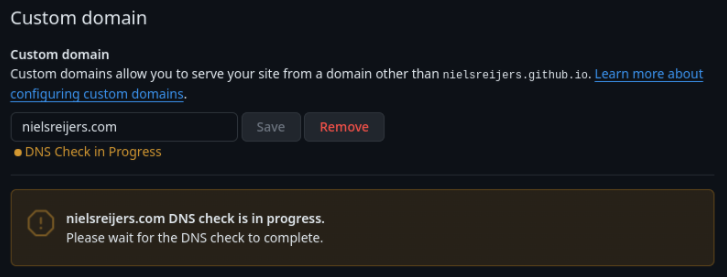
At this point the instructions say it takes some time for the changes to the DNS records to propagate, and that dig nielsreijers.com +noall +answer -t A should show the new IP addresses after a while. But it never changed:

After a little while I realised it wasn’t going to, because Cloudflare was in front of my site, so the DNS lookup always resolves to Cloudflare. When necessary Cloudflare passed on a request on to to Gandi before, and this has now changed to GitHub Pages. But that’s all hidden from the client’s view and the domain name still resolves to the same Cloudflare IP address.
Success!
After refreshing the GitHub UI, it showed everything has been configured correctly:

And my new site, including blog, appeared at https://nielsreijers.com!
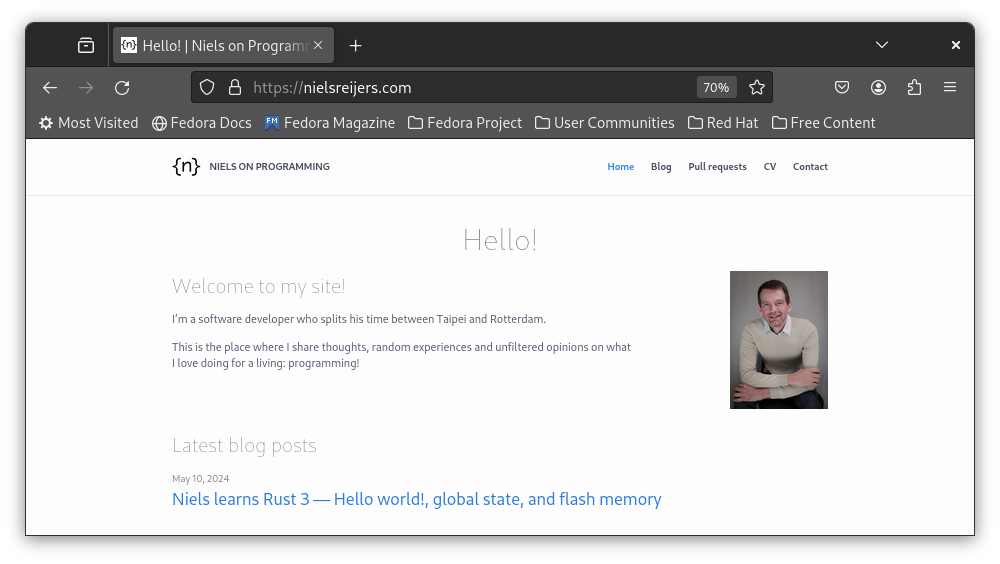
Nothing is running in Gandi anymore. DNS is in Cloudflare, and it points to pages hosted in GitHub. That doesn’t mean I have anything against Gandi though. I’ve been very satisfied with their service for years and will happily keep paying them for my domain registration.
But for hosting a simple site like mine, GitHub Pages offers both a simpler and cheaper solution.
Tags: [web]
